Lifting The Veil Of Mystery
I love traveling. Full stop. And while the last two years weren't much in terms of spending time away from the safety and comfort of my home, I used to travel a lot. Often in far flung places, off the beaten track, and far away from any prosthetist. As I never take crutches on oversee trips (and hardly on any of the trips around Europe) my prosthesis is the key to my mobility. If it fails, I am stuffed. So I like to be prepared for a range of situations in which I might have to fix my prosthetic leg or foot or socket myself. At the same time I like to travel light; i.e. everything needs to fit into my backpack.
Why Have An Emergency Kit?
Looking back at the time since my amputation in 2005 - amazing how time flies -, there were only a handful of situations in which my prosthetic devices failed me. I broke a couple of feet, I managed to drain all the hydraulic fluid out of my first C-Leg, another one of my high-tech limbs decided it wouldn't stop vibrating until the battery was flat, one microprocessor knee just stopped charging from one day to the next, and I popped the valve including its housing out of my socket when I jumped down from a boulder. None of these incidents were dramatic. But all of them were annoying, especially as many of them happened abroad, far away from my trusted support system of experienced prosthetists, and during my holidays or while on business trips.
To be better prepared, I put together an emergency bag that travels with me most of the time. The content changes constantly. While some key items have been in there from the very beginning, others come and go - sometimes depending on the destination and the kind of trip I am on; sometimes as their perceived usefulness changes over time.
I often share my adventures here on the blog, via my podcast, or on Instagram and co. I talk about the highlights and the lowlights. This means that I also let you in on the times when things don't go as planned, when the prosthesis gives me trouble, or the residual limb is open and painful. An honest assessment of the challenges I face helps me to learn, to stay creative in order to mitigate problems in the future, and to build up my emergency kit I need. Talking openly about these experiences also means that I often get asked to share tested advice and help people in their preparations for longer trips and adventures big and small.
One of the questions that comes up regularly is the one about the content of my emergency bag.
So let me lift the veil of this mystery here and now!
A Creative Mindset Is Key
Did I just say here and now? Well... before we talk bag content, I want to be clear about two things.
First and foremost, these tips and tricks work for me. They are part of my repertoire to deal with unexpected challenges and failing gear when no professional help is available. They are in no way a proper alternative to professional help by your prosthetist. Never! Let me be clear here: Fiddling around with your prosthetic leg or arm or foot comes with certain risks and the a danger of personal injury or worse in terms of your own safety. And with the risk of further damaging your prosthesis or losing the warranty in terms of your prosthetic device. So when you find yourself in an emergency situation because of failing or broken prosthetic equipment, take a deep breath, relax (panic never helps to take well informed decisions), assess the options you have realistically, assess the associated risks, and then decide on whether an emergency DIY repair is a good idea or not. And if you decide to go for the DYI repair option, be clear that you do so at your own risk.
The second point is of a different nature. It's about mindset and creativity. About seeing the bigger picture and thinking in context. I am convinced that the best two tools in your emergency kit are the ability to stay calm under stress on the one hand and the ability to think creatively and outside of the box on the other hand. You need to be able to develop clarity what needs to happen in order to deal with a sudden emergency, a failing or broken prosthetic device. And you need to be able to implement the respective plan to deal with the challenge with the - most often - very few items you have with you. This seldom works the first time. But you get better at it with practice and over time. As a result, I strongly encourage you to play through a variety of possible challenges and to develop creative ideas on how to deal with these challenges in a safe and conducive environment - prior to your actual adventure. Ask a friend to play the devil's advocate and test your plan and tease out its weak aspects and unreasonable assumptions. Ask others to develop creative ideas to a certain problem you give them and then share these ideas with you. Get into the habit of playing the 'What if...' game; i.e. when you are out and about, ask yourself what you would do if a certain problem arises right then and there. If the battery of your prosthetic leg unexpectedly runs flat and you still have to come down from a mountain? If the valve from your socket fails and the vacuum suction is broken so your socket falls off? If, if, if? This can be great fun. And if you have kids, get them involved. They often have the best ideas!
Good, so much for that. And now back to the actual emergency bag and what's in there.
What's In The Bag?
Remember: I like to travel light. And this means I try to keep my emergency kit - both for medical as well as for technical issues - small and to a minimum. It's always a compromise, always a tradeoff. Sometimes I take more items, sometimes less. But it obviously means no crutches, no carbon fiber repair kit, no second liner or what have you.
Here are the items I always have in my emergency bag
- Allen key/hex key - so if one of the screws comes loose - or a broken one needs to be exchanged against a new one - I can easily do that. An Allen key is light and packs down nicely so there is no reason not to have one with you. If you have a small and lightweight torque wrench, even better. Then you can stick to the guidelines of the manufacturer of your device when tightening the screws. But if this is not an option, a simple Allen key does the job.
- Spare screw - so if one of the screws breaks I can replace it while on the road. Ask your prosthetist for a spare screw or two and take them with you. Again, they are small and fit into any emergency kit. So there is no reason not to take them.
- Spare valve - so if the valve breaks or has sand or other particles in it preventing it from working properly I can just replace it with a new one. Again, the item is small and lightweight and should be in your emergency kit. I had valves failing on trips and trying to repair them on the go with chewing gum and other sticky material might earn you plenty of admiration by MacGyver and applause from people you meet on the trail. But it seldom works. So having a spare valve with you is a good idea. Although one that might be a but more challenging to implement. If you have an old socket, great. Take the old valve. If not, ask your prosthetist if s/he can give you a used one s/he doesn't need anymore. But if this is not possible, be warned that spare valves are expensive. I once thought I buy one from my own money - just in case. And then changed my mind when I saw the 300,00 US$ price tag.
- Silicon glue - this is a small tube of silicon glue that often comes with a new liner (or that your prosthetist might have lying around from other customers). It is often used to seal the edges of a new liner once it's cut to size. But it can also be used to deal with broken valves and seal small leaks around the housing of the valve. I also hear about people creating stronger or additional silicon stripes on the outside of the liner in order to create a better and more reliable fit of the socket within the carbon socket. So taking a small tube of silicon glue with you is a good idea.
- Duct Tape - well, who leaves the house without it. I rest my case.
- Kinesio tape - this is slightly elastic medical/therapeutic tape and it is often used to prevent or treat common muscle or joint related injuries. And yes, that is one of its uses and as such it might be a good idea to have some in your medical kit. But here - DYI approaches to deal with breakdowns of your prosthetic devices - I would like to share another use for kinesio tape. As you might know I find it hard to have a well-fitting socket when I am very active as I have rather high levels of volume fluctuation in my residual limb. So long days out hiking tend to be a problem. The more of the volume I loose in my stump, the harder it is to get a good and snug fit of the socket. The Revofit adjustable dial helps a lot, but sometimes event hat is not enough. Once the volume is down and the seal-in ring starts rolling up easily, I need to bring in additional measures. And the easiest is to fix the seal-in ring in place with a layer of two of kinesio tape. It is strong enough to keep the seal-in ring in place. t the same time it is elastic enough to allow the muscles to work properly and not limit blood circulation. And the tape's rather rough texture adds friction and increases the chances that the residual limb stays in place within the socket.
- Seal-in ring - as with many of the other items mentioned above, this is first and foremost about having a spare one in case the one I am normally wearing breaks. Without the seal-in ring I am stuffed. In addition, having the option of adding a second ring to the set-up gives me yet another way of dealing with volume fluctuation of the residual limb throughout the day and when on longer hikes.
- Cable ties - the newest edition to my emergency bag. After I recently broke yet another foot, I tried to fix it with a handful of cable ties and some Duct Tape. Not ideal, but possible. The ties seem to be strong enough to hold the individual carbon blades of a prosthetic foot together and get you off the trail or down from a hill without calling in the emergency services. Add a thick layer of tape and a sturdy walking boot and I think you are fine until you have access to a prosthetist.
- Patches made from old liners - I have spoken about this life hack a few times before as it is - in my eyes - one of the simplest and most effective ways to deal with volume fluctuations of the residual limb and the respective loss of a proper fit of your socket through an active day. I often cut up old liners into kidney-shaped patches and take two to three with me on my walks. Especially when I still had a non-adjustable socket, I could use them when needed. When I noticed that the fit of my socket worsened as the volume of my residual limb decreased, I just took off the prosthesis, rolled down the liner, placed one of the patches with the silicon side face down only my leg (normally upper lateral side), rolled the liner up again, got back into the socket and could continue with whatever I was doing a couple minutes later.
Here are the items I sometimes have in my emergency bag
- Waterproof bag (as used for kayaking) - before I started using the Genium X3 - so the waterproof microprocessor knee - I often had a thin waterproof (kayaking) bag with me. Something to quickly step into to protect the leg from water or mud when crossing small creeks during a hike, walking on wet and soggy ground, or when being at the beach and having to get through shallow pools and the like. It's not very trendy and you need to hold in place with your hands or carry additional tape, but it does the job and is a rather affordable option.
- Nylon or dyneema sling (as used for climbing) - the last item and one I seldom have with me. But as I had some unpleasant experiences when the leg just wasn't holding in place; when the socket kept on falling off, I still take a dyneema sling with me on some of my longer or more demanding hikes. A measure of last resort if everything else fails. I tie the sling around the prosthesis, right underneath the socket and above the actual joint. I feed the sling through the hip belt of my backpack, before bringing it over to the shoulder diagonally across from the amputation. It needs a bit of playing around, but if you find the right balance between being tight enough to hold the leg in place and being lose enough for the prosthesis to swing and allow you to walk, you have yet another option to address problems during a hike and walk back to safety by yourself without needing to call in help or the emergency services.
Two other trusted items (but they are more part of the medical kit, not the initial emergency repair kit for the prosthetic devices)
- Udder cream - a vaseline-style ointment often with some calendula mixed in that I use to reduce friction and keep sore spots and broken skin to a minimum. A small amount is all I need. And while some companies from the prosthetic industry offer some of these products, I normally just use a cheap one from my local drug store. It costs a fraction of the price and it does the job.
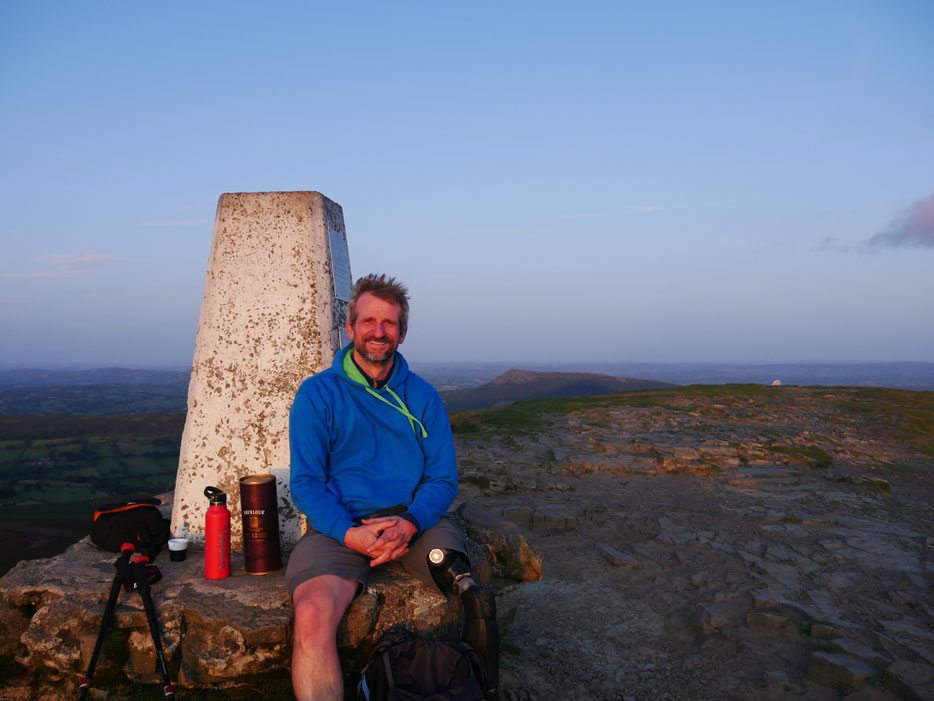
- Blister patches - last but not least: Blister patches. They have been a trusted companion of mine from the very first longer walk I did after my amputation back on New Year's Day 2006 in the Black Mountains in Wales. And I have gone through hundreds of them over the years. Some days, I need loads, other times I am fine without them at all. But, yes, they are always in my kit.
DIY Repair Of My Prosthetic Foot


Beitrag von Björn Eser, dem Gründer von und Macher hinter The Active Amputee.
Further Reading
Dealing with volume fluctuations
Here is a problem many active above knee amputees know all too well. A problem that is often overlooked as more and more attention is given to the newest developments around high-tech knees and other exciting advancements in the prosthetic sector. It’s the problem of a proper fit of the socket. It’s the key to using your prosthetic leg to its full potential. And how to deal with fluctuations in the volume of your residual limb - and thus with the fit of your socket. Read more
USB charging device
Yes, finally it’s out. The USB charging device from OttoBock to charge its microprocessor knees. This is something I have been waiting for for a long time. And looking back at the last 20odd years, this device will be up there among the few items which really broke new grounds for active amputees. After the introduction of microprocessor knees and the first fully waterproof microprocessor devices this charger is another big step to be fully independent. Read more